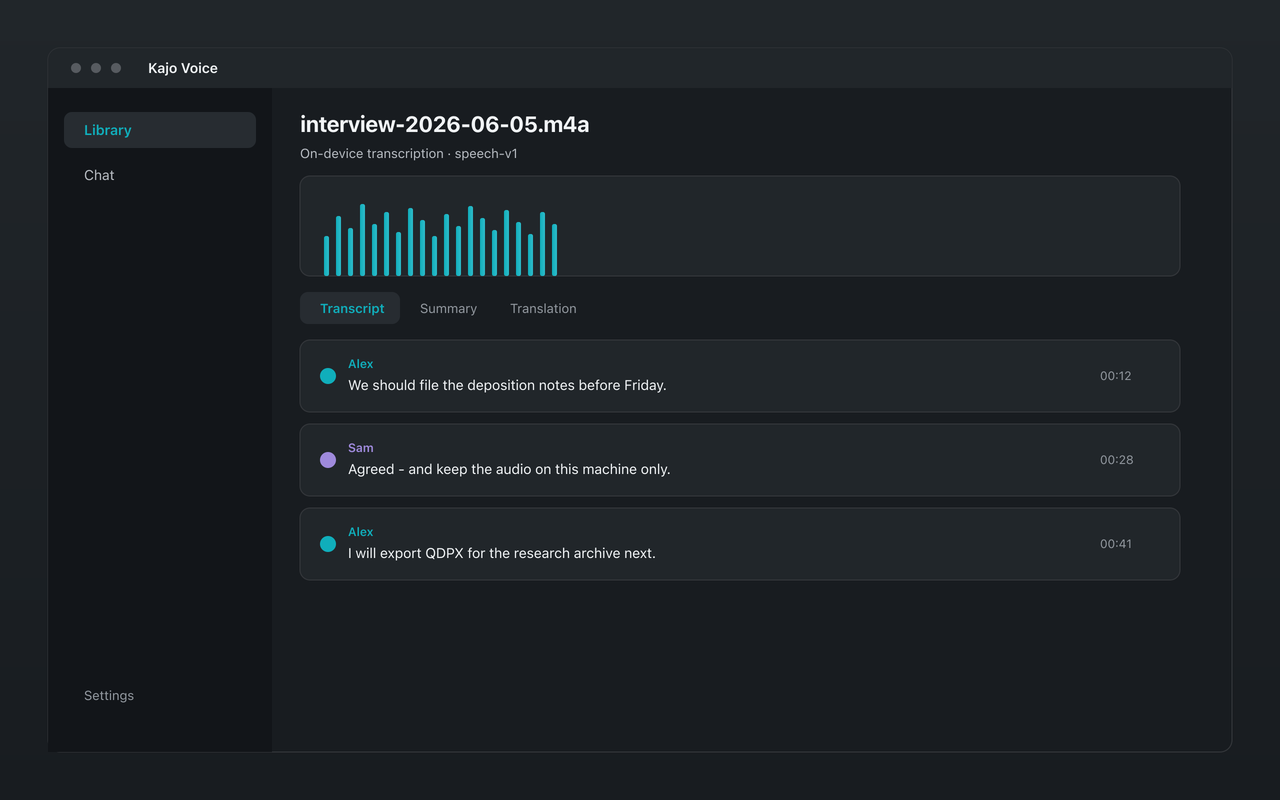
Transcribing audio — converting spoken words to written text — has gone from a slow, expensive manual process to something anyone with a modern laptop can do without sending the audio anywhere. This guide walks through the whole path for an archive of recordings you already have: import, transcription with speaker labels, review, summaries and translation, export, and the library you can ask with citations afterwards.
Three ways to get a transcript
1. Human transcription services. You upload audio to a service and human transcriptionists produce the text. Accurate for most audio, slow (turnaround is measured in hours or days), and priced per minute — Rev’s human service is $1.99 per audio minute.
2. Cloud AI transcription. You upload audio to a service (Otter.ai, AssemblyAI, Notta) and their servers run an AI model. Fast and cheaper, but the audio leaves your device and sits under the vendor’s retention policy.
3. Local AI transcription. You run the model on your own machine — Kajo Voice, or an open-weight model from a terminal (see the engine guide). Private, no per-minute cost, and the same class of model the cloud services run. It needs a reasonably modern computer: 16 GB of RAM.
Everyone whose audio cannot be uploaded ends up at option three. The rest of this guide is that path in Kajo.
Step 1: Prepare your recordings
Better input audio produces better transcription.
File format. Kajo takes MP3, WAV, M4A, FLAC, AAC, OGG/Opus, MP4, MOV, and WebM (MKV via folder import). Video files are handled by extracting the audio track — you don’t need to separate it first. If your recording is in a proprietary format, convert it with a free tool like VLC or Audacity.
Audio quality. Poor recording quality is the most common source of transcription errors. Where you can: record in a quiet space, use a headset or lapel microphone rather than a room mic, and avoid phone-speaker recordings — the compression is too heavy.
Sample rate. 16 kHz or higher is ideal. Most modern recorders capture at 44.1 or 48 kHz — these work fine and are downsampled automatically.
Step 2: Set up Kajo once
- Download the app from /download (Mac, Windows, or Linux).
- On first launch the app downloads its models once — ≈2.2 GB of models before your first transcript (≈2.5 GB on macOS); ≈9 GB in total once the chat model finishes downloading in the background. Download once — everything runs offline afterwards.
- After that, transcription, translation, summaries, and chat all run with the network off.
The free tier covers the core loop on 5 files or 150 minutes of audio — total, for life. One payment ($49 launch / $99 standard) unlocks unlimited imports and Lifetime convenience (watch folders, batch export).
Step 3: Import
Create a folder in the Library for the project — one per study, story, client, or engagement — then drag the recordings in, or use the Import button (the picker takes folders on macOS; Windows and Linux have a separate Import folder button). Recordings from a handheld recorder, a phone, or a Zoom local recording import the same way. On Lifetime, a watch folder can pick up new files from a directory on disk automatically.
Each file is imported and transcribed one at a time, with progress shown as it goes. The recording date is read from the file and is editable — it is what dated questions in chat later use.
Step 4: What happens during transcription
One on-device engine transcribes the file — Transcribes 98 languages on your laptop — all on-device. Language is decided once per recording, from its opening; if one language dominates a mixed recording, set it in Settings → Transcription so a short opening in the other language cannot mislabel the whole file. Speech and sung vocals decode under different profiles, chosen automatically.
After the transcript, Kajo labels the speakers automatically for that recording. Rename them once; the names follow into exports, summaries, and cited answers.
Step 5: Verify and correct
Review the result in Kajo’s viewer. The usual suspects:
- Proper nouns: names of people, places, and organizations
- Technical terms: specialized vocabulary
- Homophones: “principal” / “principle”, “there” / “their”
- Crosstalk: moments where voices overlap — these produce the most errors, in the text and in the speaker labels
Click a segment’s timestamp to jump the player there; words highlight as the audio plays. Fix a miss once with inline segment edit — the correction re-indexes chat without re-transcribing. Transcription is one-shot after filing; the only re-run is “Transcribe with different profile…” to switch between speech and sung vocals.
Step 6: Summaries and translation (optional)
Open the recording and use the Summary tab to generate an on-device summary — brief, bullets, or detailed — each carrying a review-required line. Translate the transcript on-device into any of 59 languages; the original stays alongside as the record.
Step 7: Export
- TXT: plain text for word processors, coding software, or search indexing
- DOCX: a formatted document with timestamps, good for sharing with collaborators
- SRT / VTT: subtitle files with timestamps — for documentary cuts, bilingual review, or any player (bilingual variants pair each line with its translation)
- JSON: per-segment start, end, speaker, and text, for custom analysis
- CSV / Markdown / PDF: spreadsheet, Markdown, and PDF handoffs
- QDPX: REFI-QDA interchange for NVivo, ATLAS.ti, and MAXQDA — transcript text with per-turn sync points and speaker codes, so coding starts from evidence
Per-file export works on Free within the allowance; Lifetime adds batch export.
Step 8: Ask the archive
The transcript is the start, not the end. Every recording is filed into the library, and a new chat opens scoped to the folder you are standing in. Pin recordings or folders as sources — with nothing pinned, chat has nothing to search, and searching the entire library is an explicit confirm. The starters — Themes, Find the quote, Quote sheet, Brief me, Who contradicted whom, Draft from citations — run against that scope, dated questions (“since March”, “the last six sessions”) use the recording date, and every answer cites speaker and timestamp or says the archive does not contain it. Export an answer to Markdown or DOCX when you need it elsewhere.
Getting the best accuracy
- Close-microphone recording is the single biggest improvement for interviews.
- Set the language when a recording is mostly one language.
- Fix recurring terms early — the first few files tell you which proper nouns to watch for.
- Review speaker labels on multi-party files before you quote anyone.
Frequently asked questions
How accurate is AI transcription? For clear, close-miked single-speaker English, current open-weight models leave mostly names and terms to fix; noise, crosstalk, and accents raise the error rate. There is no published Kajo benchmark yet — run one real file through the free allowance rather than trusting a percentage. See what accuracy to expect and how to check it.
How long does transcription take? On Apple Silicon the model runs with GPU acceleration; on CPU-only machines (Intel Macs, most Windows and Linux laptops) it runs on the CPU and takes longer — queue a batch and let it work. There is no published Kajo benchmark yet.
Can I transcribe video files? Yes. Kajo extracts the audio track from MP4, MOV, and WebM files (MKV via folder import) and transcribes it.
Does transcription work offline? Yes, after the one-time model download. Transcription, translation, summaries, and chat all run locally — no internet required after setup.
What languages are supported? Transcribes 98 languages on your laptop — all on-device. The full list is on /transcribe.